![]() Welcome to Lightwright Touch. This guide will introduce you to the basic features and functions. If you are a Lightwright user you will find a lot that's familiar. If you don't use Lightwright, but depend on schedules and hookups produced from Lightwright, Lightwright Touch is the best way to carry the information with you, find what you need quickly, add notes, and send changes back to the original Lightwright source.
Welcome to Lightwright Touch. This guide will introduce you to the basic features and functions. If you are a Lightwright user you will find a lot that's familiar. If you don't use Lightwright, but depend on schedules and hookups produced from Lightwright, Lightwright Touch is the best way to carry the information with you, find what you need quickly, add notes, and send changes back to the original Lightwright source.
If you are updating from and earlier version, read the summary of New and changed features.
Please send us feedback and questions, which will help to make the app and this guide even better.
Email now.
Lightwright Touch will install a sample show to get you started. To open it, tap the  button, select Load Show and then Sample Show.lwx.
To load your own show into Lightwright Touch you must first export it from the Mac or Windows Lightwright 5 or 6 application in Lightwright Touch format. You can then use iTunes™ to transfer the exported file to the iPad, or you can email it, or use web services such as Dropbox.com or Box.net or local network solutions like AirSharing to transfer the show to Lightwright Touch. (iDisk does not allow sharing in this manner.) Here are the step-by-step instructions.
Export from Lightwright 5 or 6 button Tap the View button and select a category from the list. Then select an item from the category's list, or type a value.
The worksheet will show only the rows fitting that description.
Tap the View button and select a category from the list. Then select an item from the category's list, or type a value.
The worksheet will show only the rows fitting that description.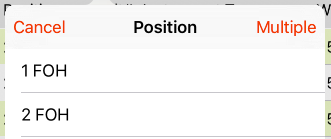 To specify multiple values for an itemized category, tap the Multiple button, and then tap each of the items you want to include in the view. Tap Done to view the selected items.
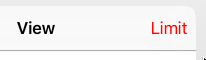 Tap View, then tap the Limit button in the View list header to set an overall limit to any worksheet rows being viewed. Set the limit's category and value(s) using the same process as selecting a View, described above.
 Tap the Sort button to choose a category to use for sorting the rows being viewed.
To quickly scroll a long worksheet, tap the scroll button next to Sort, then choose a category item or type a value. The scroll button appears only when the iPhone/iPod touch is in landscape orientation.
Tap the Sort button to choose a category to use for sorting the rows being viewed.
To quickly scroll a long worksheet, tap the scroll button next to Sort, then choose a category item or type a value. The scroll button appears only when the iPhone/iPod touch is in landscape orientation.
 To view all rows containing the same value as a particular worksheet cell—a channel number, for example—and only those rows, tap the value then select View. This is the same as Lightwright's Jump function.
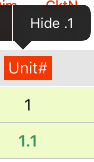
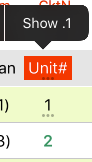
If you use decimal unit numbers to indicate fixture attributes, you can easily hide all of the attribute rows by tapping the Unit column heading and selecting the Hide .1 command. Three dots appear below any unit number that has hidden rows. Tap Show .1 in the same menu to reveal all of the hidden rows. A .0 row will never be hidden.
 Tap the Recent button to see a list of your recent View/Sort combinations. Tap the < and > buttons to step backward and forward through the sequence.
The Recent and > buttons appear only when the iPhone/iPod touch is in landscape orientation.
Tap the Recent button to see a list of your recent View/Sort combinations. Tap the < and > buttons to step backward and forward through the sequence.
The Recent and > buttons appear only when the iPhone/iPod touch is in landscape orientation.
Lightwright Touch uses the show's category column orders that were set up in Lightwright 6. Each Sort has its own column selection and order, often with the sorting category as the left column. In Lightwright Touch you can modify any Sort display by changing column positions, and adding or removing columns.
To change a column's position, drag its title left or right in the worksheet header.
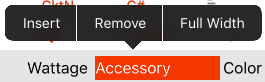 To add or remove a category from the display, tap on the title, then select Insert or Remove from the menu.
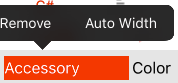
Choose the command Auto Width to return the column to automatic adjustment.
You can load another show file's category columns by tapping Load Columns under the button. Select a show file from the list.
The new column arrangements will replace the old ones for all sort types.
Note that Lightwright Touch may temporarily hide columns at the right edge of the worksheet if there is not enough space to show them. Expanding a column near the right edge of the display to Full Width may make it too big to fit, in which case it will be hidden. Columns widths are adjusted as row contents change, which may cause columns to appear and disappear while "Next"ing through selection values for the category being Viewed.
Rotating the iPad to landscape orientation will allow some or all of the hidden columns to be seen.
To change a value, tap it and then tap Edit. Or just double-tap a value to edit it.

 If the category is list-based, a list of possible values will appear. Tap one to choose it.
Tap the + button to add a new entry. If the category is numeric—a dimmer number, for example—the keyboard will appear. Type a new value and tap Done.
If the category is list-based, a list of possible values will appear. Tap one to choose it.
Tap the + button to add a new entry. If the category is numeric—a dimmer number, for example—the keyboard will appear. Type a new value and tap Done.
Shake to undo the last change made.
Tap the Undo button to undo the last change made.
You can view or email a list of all the changes you have made. See Viewing changes.
Some actions relate to entire worksheet rows. Tap on any value and select the Row Actions menu item to see a new menu of the possible actions for the row.

Tap Row Note to add a note to a row. See the next topic Adding Notes for details.

To add a hilite color to a row tap Hilite Row. To remove the color tap Unhilite Row. Choose the next color to use by tapping the hilite color square in the tool bar. The color square appears only when the iPhone/iPod touch is in landscape orientation.
Tap Row Details to see a list of every category value for the row.
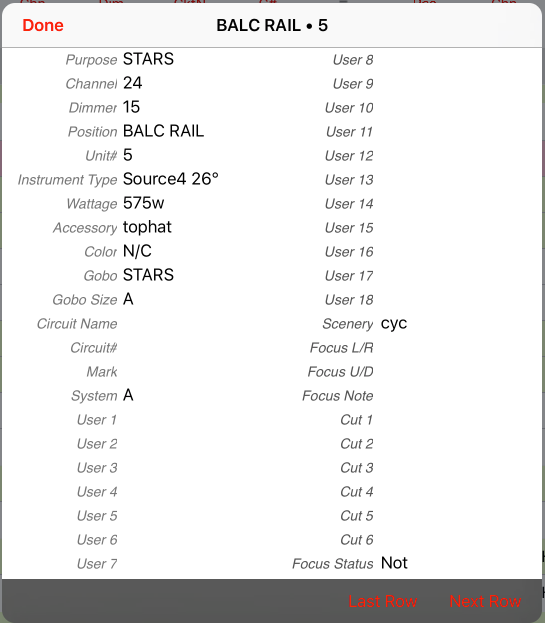
Last Row and Next Row buttons let you step through the rows in the current view selection.
Lightwright Touch does not support worknotes at this time, however there are ways to add a simple note to a worksheet row, and keep a list of general notes.
 Tap any value in a row and select Row Actions then Row Note to add, edit, or clear a note for a specific row. The note appears in red in the new space below the row's usual information.
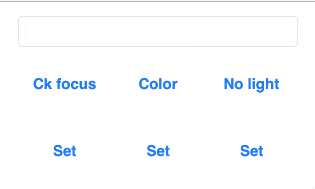
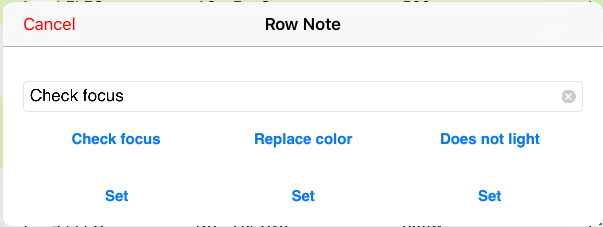 Commonly used words and phrases can be stored in the buttons below the typing area. Tap a button to insert the phrase.
To change a button's content, type a new phrase and then tap Set.
The Set buttons are shown only when the iPad is in portrait orientation.
Commonly used words and phrases can be stored in the buttons below the typing area. Tap a button to insert the phrase.
To change a button's content, type a new phrase and then tap Set.
The Set buttons are shown only when the iPad is in portrait orientation.
You can view only the worksheet rows that have notes by choosing View > Special > Has Note.
Lightwright Touch also lets you keep a list of general notes. Tap the button and select Edit General Notes.
When you reconcile a Lightwright Touch show back to Lightwright 6, an additional window will open listing all of the notes from the Lightwright Touch show.
In Lightwright Touch you can also choose to email all row notes in the current View, plus the general notes, by tapping Email Notes in the list.
You can view and email a list of all items that you have changed. The position, unit number and channel are listed for identification, as well as the category that was changed and the new value.
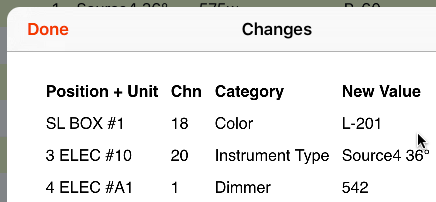
Tap and then select Display Changes to see a list of the changes. Select Email Changes to compose an email of the changes.
Emailing changes is sometimes the quickest method for transmitting a few updates back to the computer where the original Lightwright show file is maintained.
You can reconcile a Lightwright 6 show against changes made in Lightwright Touch. First you'll need to transfer the .lwx file back to Lightwright 6. The file transfer can be done with iTunes or by email.
Transfer from iPad... buttonTap the button and select Adjust Settings to open the settings page. Here you can select worksheet display options.
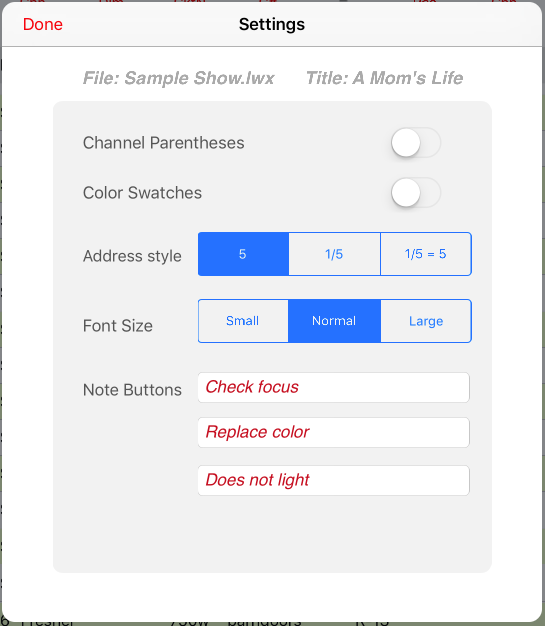
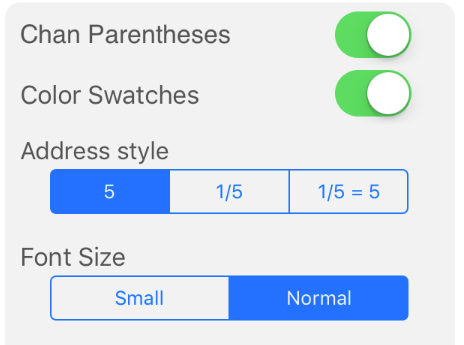
Use the Channel Parentheses switch to select whether to show channel numbers in parentheses. You can also change this directly on the worksheet through a tap on the column title, which will display a menu with command to show or hide parentheses.
Use the Color Swatches switch to select whether to show swatches. On the worksheet, a tap on the column title will display a menu with a command to show or hide color swatches.
Use the Address Style selector to choose the address display style. 5 displays only the global address, 1/5 displays the universe name and the address within that universe, and 1/5 = 5 displays both.
The Font Size selector lets you choose the worksheet's text size. Small squeezes the most information on the screen, but selecting values for editing may be difficult. Large is easiest to read, but fewer rows can be seen. Normal provides a good balance between legibility and the number of rows on the screen. You can also change the font size by using a pinch gesture on the worksheet.
The text phrases inserted by the Row Notes buttons can be changed in the Note Buttons fields.
Lightwright Touch provides a portable version of a Lightwright 6 worksheet. You can view, sort, navigate, and edit worksheet information including the 15 basic categories and the 18 user-defined categories.
Many additional features are available in the full version of Lightwright 6. These include worksheet functions such as adding and deleting rows, editing multiple cells at once, collapsing and expanding multi-row fixtures, changing toolbar button assignments, displaying gobo thumbnails, and adding flags, footnotes and bookmarks.
Lightwright 6 also includes worksheet support functions such as manipulation of category titles and value lists, defining dimming and control system parameters, color scrolls and gobo wheels, a powerful worknote organizer, graphic focus charts, formatting and printing of dozens of types of schedules and reports, live data exchange with Vectorworks, as well as the creation of new show files.
In the future Lightwright Touch may include more Lightwright 6 features through free upgrades and/or purchased add-on modules. Learn more about Lightwright 6 from your City Theatrical dealer, or visit http://citytheatrical.com .
Changed
New
Changed
button combines the functions of the old Guide, Show and More buttons.Tap and select Email Questions or Suggestions to send an email.
Select Rate or Review in App Store to visit the Lightwright Touch review page in the App Store. Please take a minute to rate the app and leave a brief review. But if you are having a specific problem, sending an email is the best way to help us solve it for you. There is no way to respond to questions posted in reviews.
Lightwright Touch was designed and developed by Eric Cornwell. All aspects of the product are Copyright ©2011-2017 West Side Systems, except as noted below.
Lightwright® is a registered trademark of John McKernon Software, used by arrangement.
The Objective-Zip library is used, with the following notice:
Created by Gianluca Bertani on 27/12/09.
Copyright 2009-10 Flying Dolphin Studio. All rights reserved.
Redistribution and use in source and binary forms, with or without
modification, are permitted provided that the following conditions
are met:
* Redistributions of source code must retain the above copyright notice,
this list of conditions and the following disclaimer.
* Redistributions in binary form must reproduce the above copyright notice,
this list of conditions and the following disclaimer in the documentation
and/or other materials provided with the distribution.
* Neither the name of Gianluca Bertani nor the names of its contributors
may be used to endorse or promote products derived from this software
without specific prior written permission.
THIS SOFTWARE IS PROVIDED BY THE COPYRIGHT HOLDERS AND CONTRIBUTORS "AS IS"
AND ANY EXPRESS OR IMPLIED WARRANTIES, INCLUDING, BUT NOT LIMITED TO, THE
IMPLIED WARRANTIES OF MERCHANTABILITY AND FITNESS FOR A PARTICULAR PURPOSE
ARE DISCLAIMED. IN NO EVENT SHALL THE COPYRIGHT OWNER OR CONTRIBUTORS BE
LIABLE FOR ANY DIRECT, INDIRECT, INCIDENTAL, SPECIAL, EXEMPLARY, OR
CONSEQUENTIAL DAMAGES (INCLUDING, BUT NOT LIMITED TO, PROCUREMENT OF
SUBSTITUTE GOODS OR SERVICES; LOSS OF USE, DATA, OR PROFITS; OR BUSINESS
INTERRUPTION) HOWEVER CAUSED AND ON ANY THEORY OF LIABILITY, WHETHER IN
CONTRACT, STRICT LIABILITY, OR TORT (INCLUDING NEGLIGENCE OR OTHERWISE)
ARISING IN ANY WAY OUT OF THE USE OF THIS SOFTWARE, EVEN IF ADVISED OF THE
POSSIBILITY OF SUCH DAMAGE.